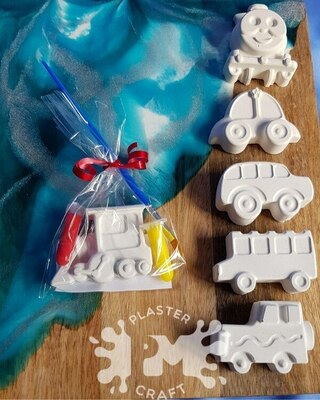
From Start to Finish: How to Make Stunning Plaster Crafts for Kids
Crafting with kids is not only a delightful way to spend quality time together but also an opportunity to enhance their creativity and imagination. Plaster crafts are a fantastic choice for young artists, offering endless possibilities for creating unique and visually appealing projects. In this comprehensive guide, we will take you through the entire process, from start to finish, on how to make stunning plaster crafts for kids.
Step 1: Preparation and Safety
Before diving into the creative process, it's essential to ensure a safe and organized crafting environment. Here's how to get started:
Gather Materials: Collect all the necessary supplies, including Plaster of Paris, water, mixing containers, mixing spoons, molds or objects for impressions, release agent (cooking spray or petroleum jelly), craft paints, brushes, a drop cloth or newspapers for protecting the work area, and disposable gloves (optional).
Choose a Suitable Workspace: Find a well-ventilated area where you and your kids can work comfortably. Cover the workspace with a drop cloth or newspapers to catch any spills.
Safety First: If you decide to use disposable gloves, ensure that your children wear them to protect their hands from potential skin irritation caused by plaster.
Step 2: Selecting the Right Plaster Molds
The choice of molds is a crucial factor in creating stunning plaster crafts. Here are some options to consider:
Ready-Made Molds: Craft stores often offer an array of ready-made silicone molds in various shapes and sizes, from animals and flowers to geometric patterns. These are convenient and suitable for kids of all ages.
Found Objects: Encourage your child's creativity by using found objects like leaves, toys, or other items to create unique impressions in the plaster. Just remember to apply a thin layer of release agent to ensure easy removal.
Cookie Cutters: Cookie cutters with interesting shapes can be used to create plaster shapes on a flat surface.
Step 3: Mixing the Plaster
Now, let's prepare the plaster mixture:
Put on disposable gloves if desired.
Measure the appropriate amount of Plaster of Paris into a mixing container. Typically, a 1:1 ratio of plaster to water works well, but you can adjust it for different consistencies.
Add water to the plaster gradually while stirring constantly. A smooth, pancake batter-like consistency is desired.
Step 4: Pouring the Plaster
Carefully pour the mixed plaster into your chosen molds or impressions. If using cookie cutters, press them into the plaster and level the surface with a spoon.
Step 5: Allowing the Plaster to Set
Allow the plaster crafts to sit undisturbed until they become firm and dry. The drying time may vary depending on factors like the thickness of the plaster and environmental conditions, but it usually takes around 30 minutes to an hour.
Step 6: Removing the Crafts from Molds
Once the plaster is completely dry, gently remove your crafts from the molds. If they resist, use a tool or your fingers to release them without damaging the plaster.
Step 7: Sand and Smooth (Optional)
For a smoother finish, you can lightly sand the edges or surfaces of your plaster crafts. While this step is optional, it can provide a more polished look.
Step 8: Painting Your Plaster Crafts
Here comes the most exciting part – painting your plaster crafts:
Gather your craft paints and brushes.
Encourage your kids to select vibrant colors and experiment with different painting techniques.
Let your children's imaginations run wild as they bring their plaster creations to life with color and creativity.
Step 9: Allowing the Artwork to Dry
Allow the paint to dry completely before handling or displaying your plaster crafts. The drying time can vary depending on the type of paint used but usually takes a few hours to a day.
Step 10: Display and Admire
Once your plaster crafts are dry and sealed (if you choose to seal them), proudly display them in your home or give them as heartfelt gifts to family and friends. These handmade creations are not only beautiful but also a testament to your child's creativity and artistic expression.
Conclusion
Crafting plaster crafts for kids is a rewarding and engaging experience that fosters creativity, imagination, and fine motor skills. This step-by-step guide takes you through the entire process, ensuring a safe and enjoyable crafting journey.
From selecting the right molds to mixing the plaster, painting, and finally, displaying the stunning creations, every step is an opportunity for learning and bonding. These plaster crafts also serve as tangible reminders of the wonderful moments you've shared with your children.


Comments
Post a Comment